
Easter Bunny Cake Decor
This post contains affiliate links so that you can get what you need to replicate this cake. This means that I receive a small commission on sales, at no extra charge to you. Thank you for reading about this bunny cake!
Guest Written by my Mom:
Ahhhhhh the joys of holiday baking. These times are fraught with emotion, from the sentimental joys of re-creating grandma’s special recipes to the pressures of creating the perfect Pinterest vision.
Think Easter dessert, and what often comes to mind is the ubiquitous lamb cake. These delightful barnyard delectables are born from various cake molds manufactured by companies like Nordic Ware and Wilton. Although it looks innocent enough, it is not entirely fool-proof as a quick search of “Pinterest fail lamb cake” will attest!
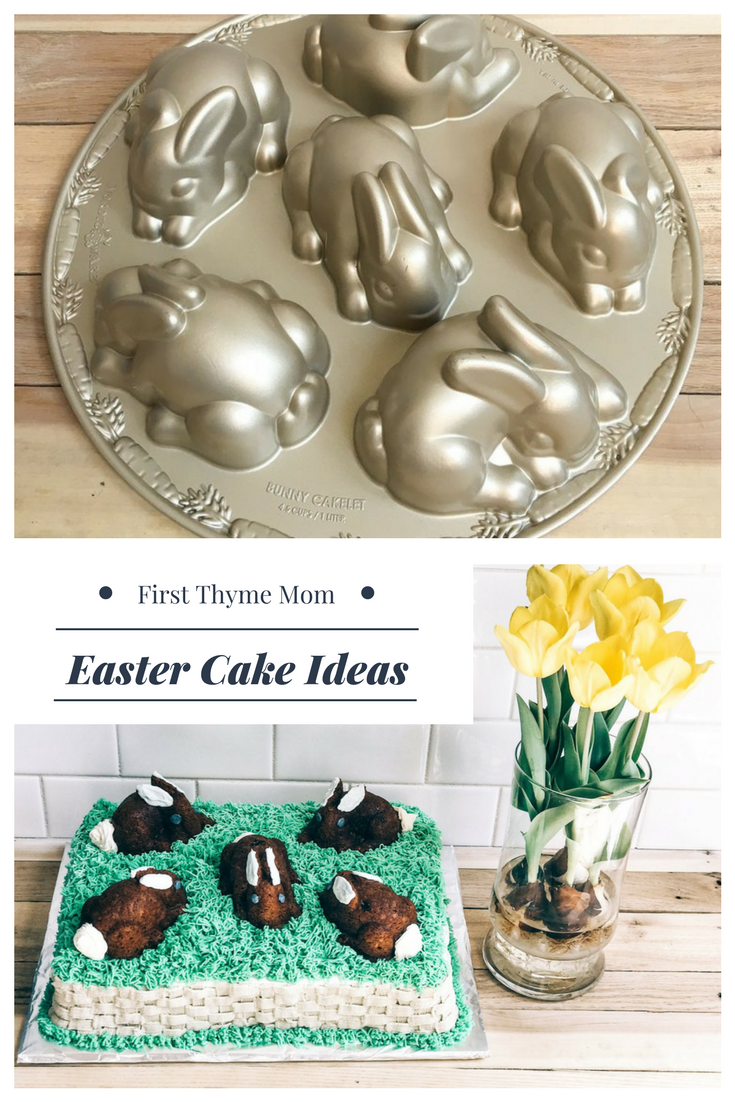
This year, I volunteered to bring dessert to my sister’s Easter gathering. I knew my mom had a decades-old lamb cake mold so I figured I was all set for making a cake. Unfortunately, four days before Easter I learned that she had either sold it in a garage sale or lent it to an out-of- state sister so I had to scramble to develop another plan. The internet provided me with a decent range of ideas for an Easter cake, and I settled on one that included the use of this Nordic Ware bunny mold:
Nordic Ware Bunny Cake Pans
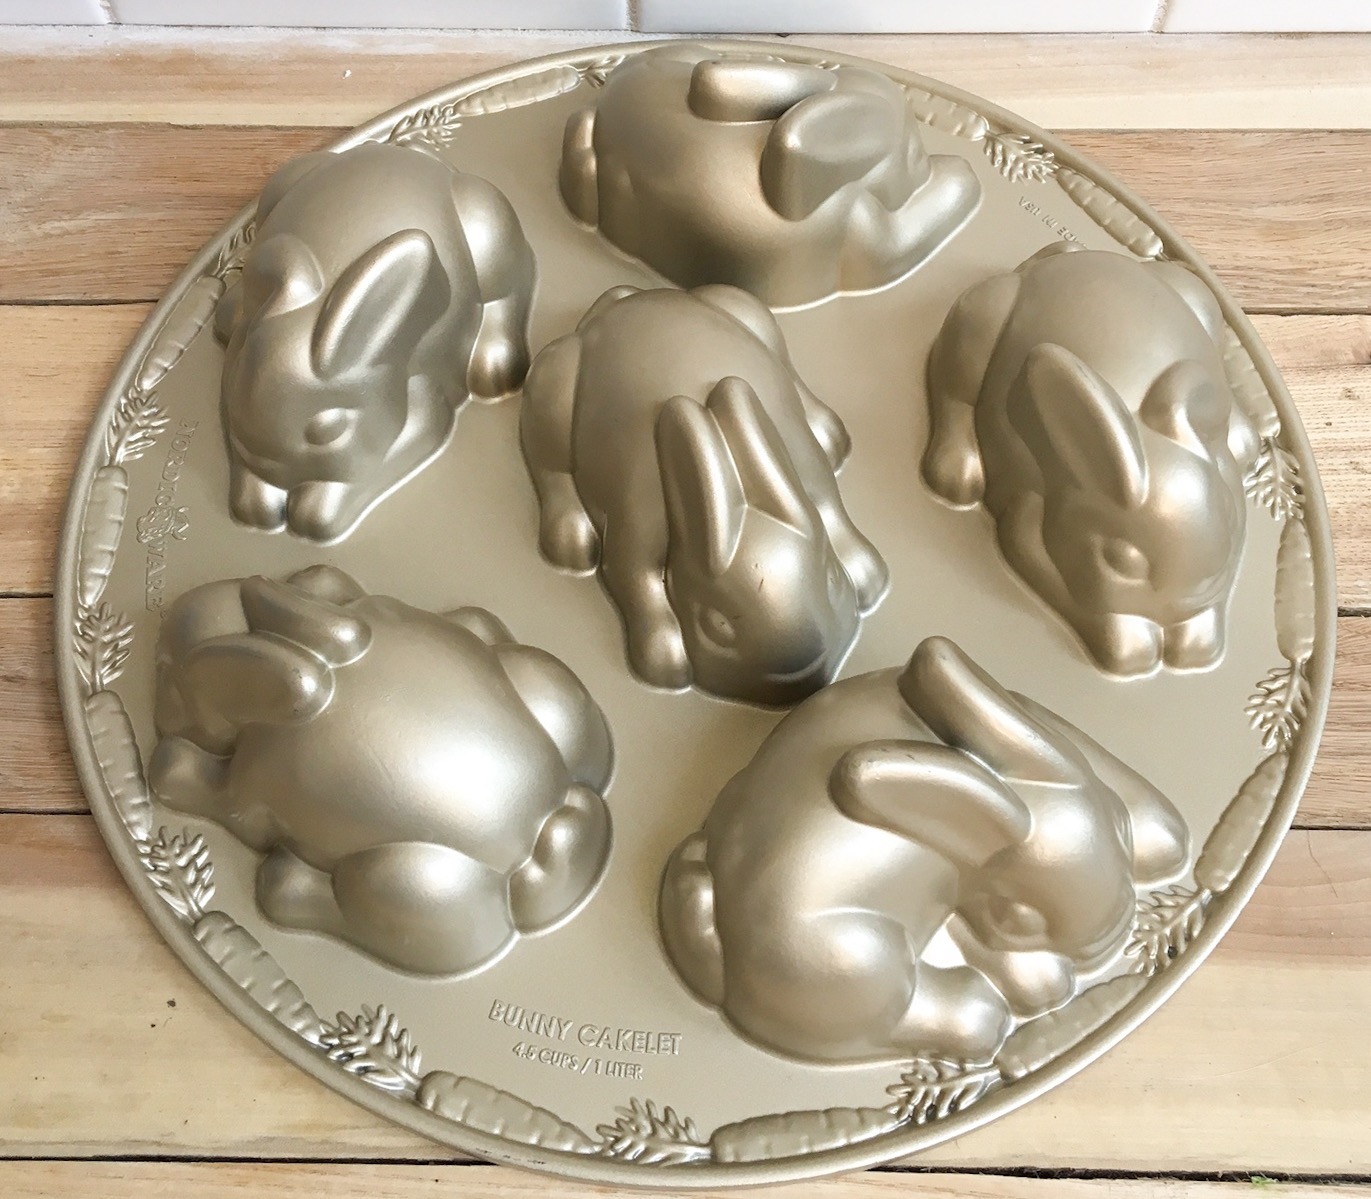
This heavy non-stick cast aluminum mold would make six small bunny cakes. It was available on-line but since I did not have time to wait for shipping, I scurried over to my local Williams-Sonoma store and scooped one up. The nice gentleman who helped me there also directed me to this special non-stick Bak-klene ZT spray, indicating that it was “not an option, but a necessity” so of course I bit on it, figuring I needed all the help I could get.
The ultimate pan release: Bak-klene ZT Spray

My plan for the dessert was to make a two-layer 9x12 cake, decorated with frolicking bunnies on top. I also planned to employ some of the cake-decorating tips that I learned when Stephanie and I took a cake-decorating class several years ago. Having made plenty of decorated cakes in the past, I was confident in my ability to pull off that part of it. However, I did feel the strong need to make some “test bunnies” since I had no clue how to get the best-looking bunnies out of my new metal gadget.
My first batch of bunnies was made using a standard boxed white cake mix. First off, I learned the special spray really did work well. After letting the bunnies cool for exactly 10 minutes, the perfectly-baked little bunnies came right out of the mold when I turned it over.
Perfectly baked bunny using a mold

The special non-stick spray worked so well that I almost feel the need to stock up on it before someone decides to discontinue it. On to the embellishments! I had tried to search out ways of decorating the bunnies. They were definitely bunny-shaped with all the definition that the mold allowed, but they really needed something to enhance their look. One idea I came across was to sprinkle them with powdered sugar. Which worked only a little. The powdered sugar did not do much to improve the look, and after a few hours the oils from the cake kind of saturated the sugar, making it basically invisible. Here is the powdered sugar bunny while it still had the sugared look:

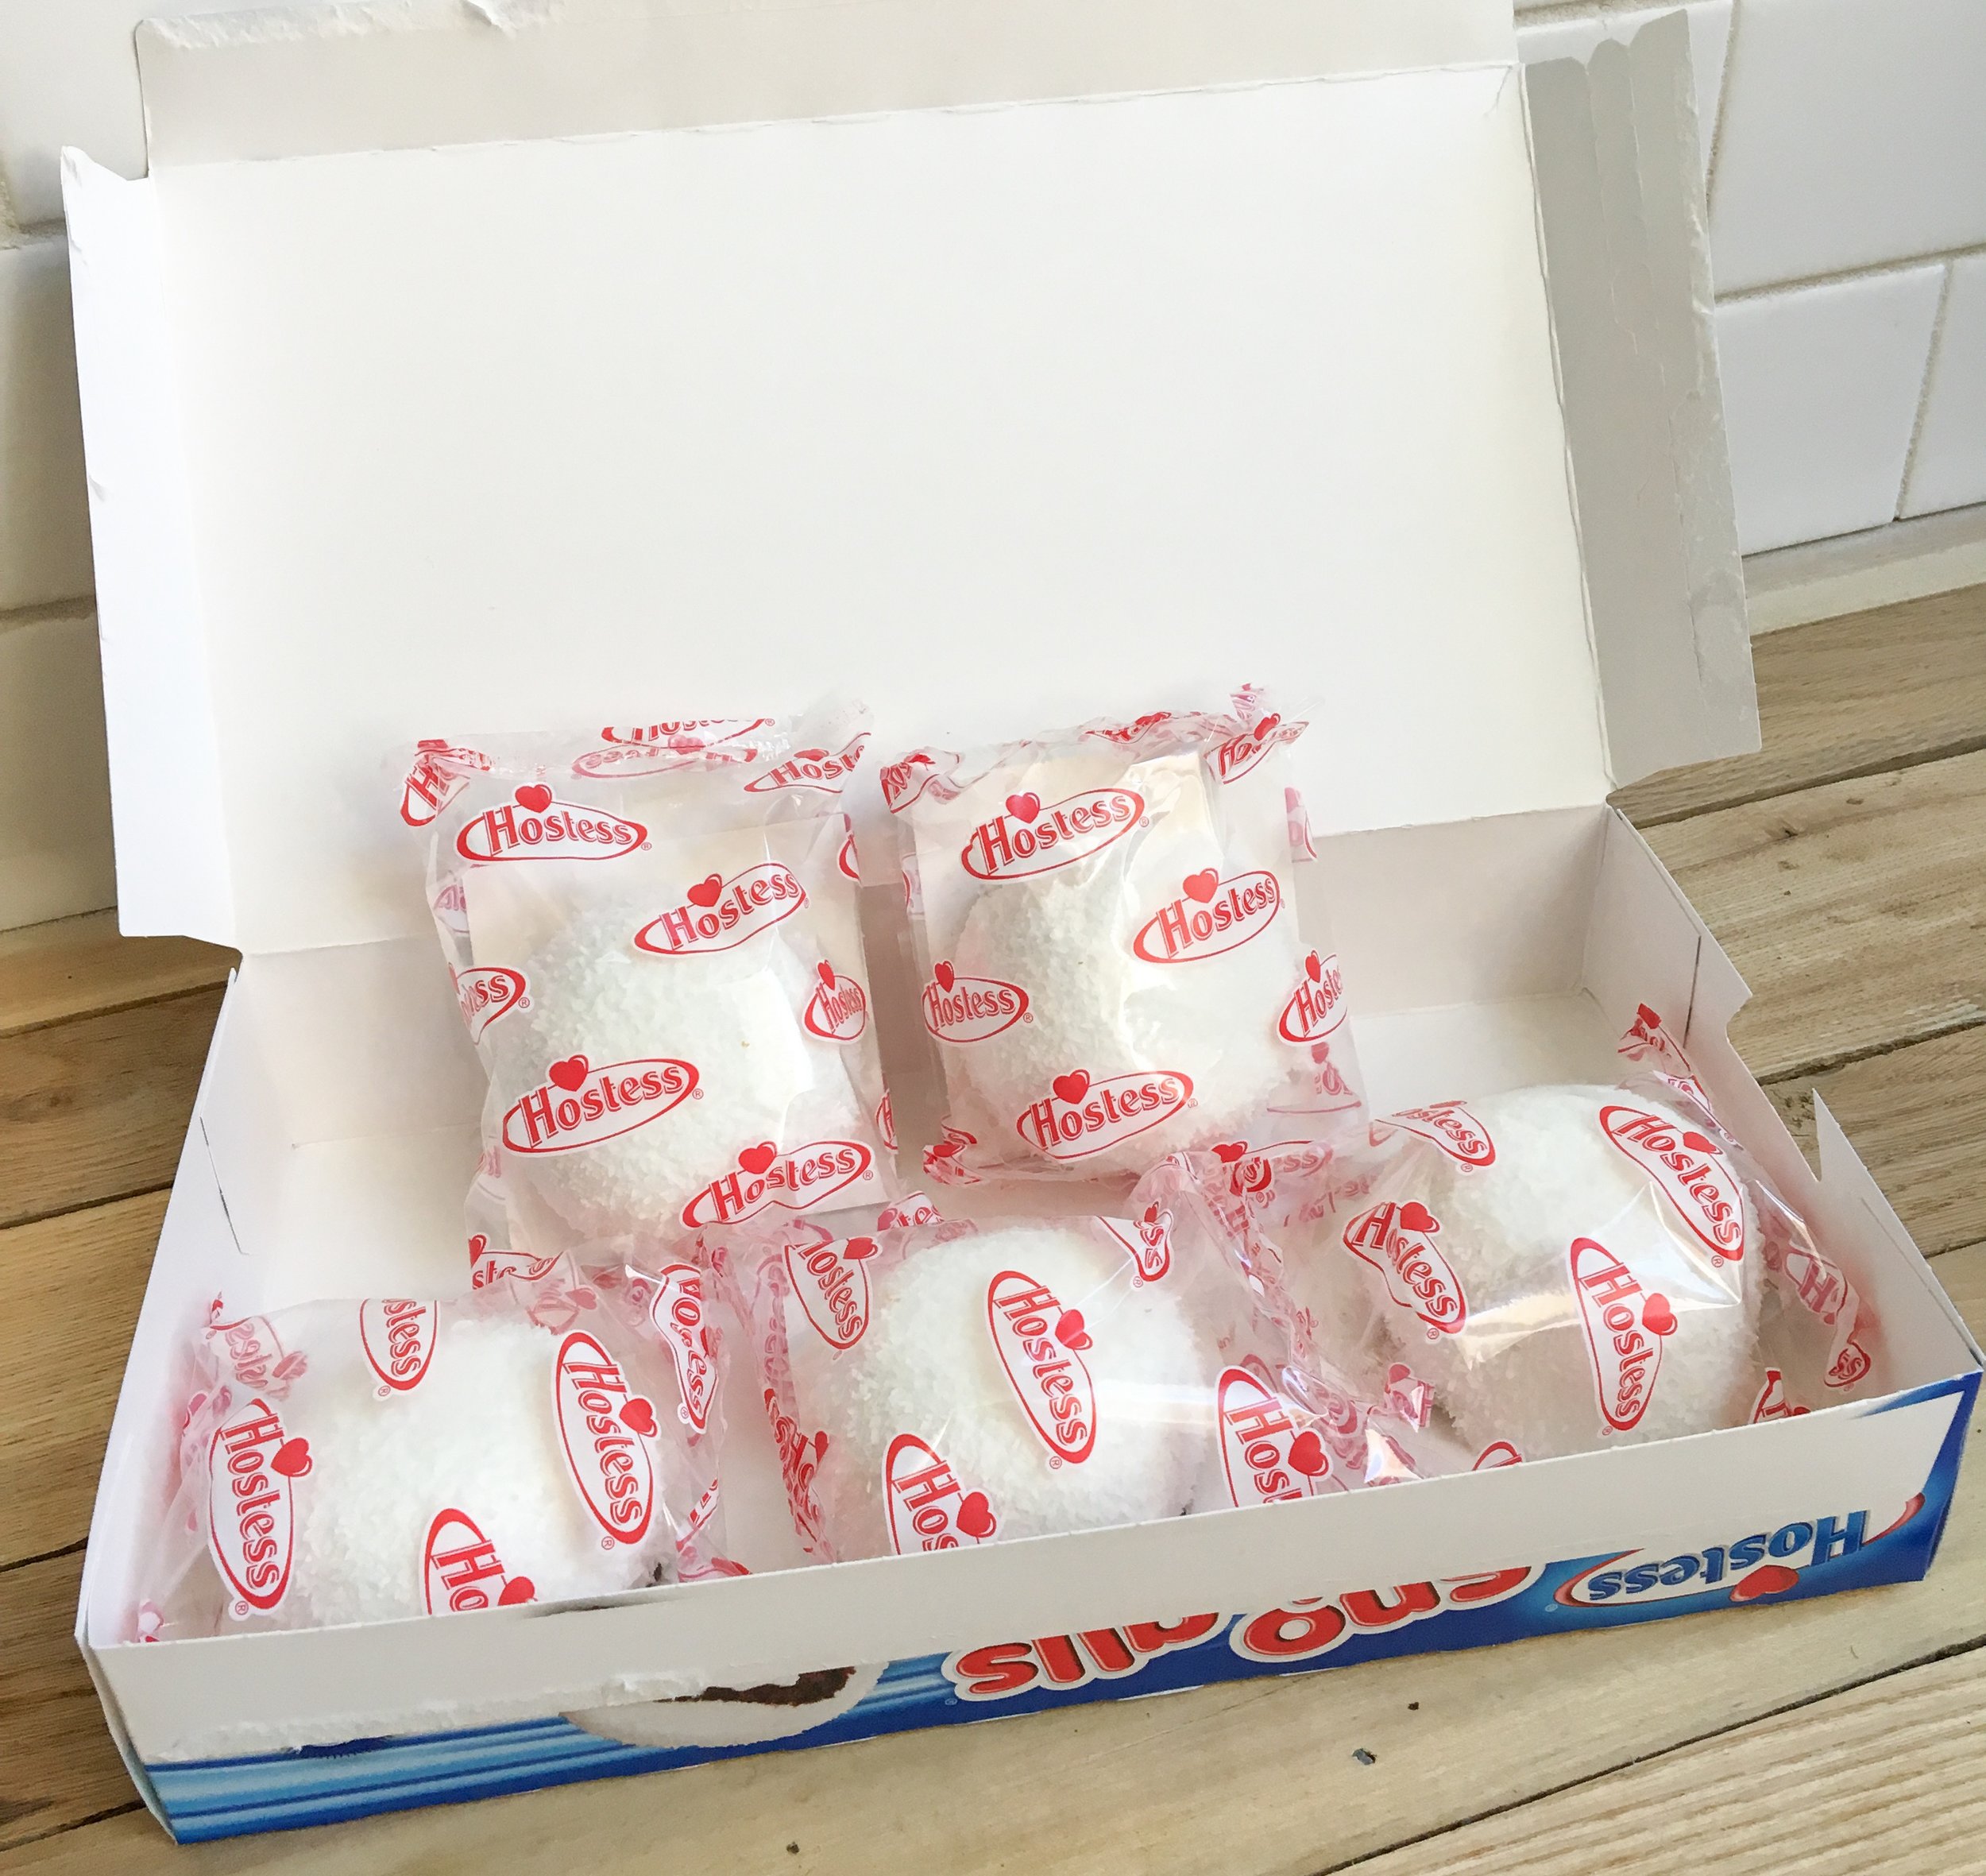
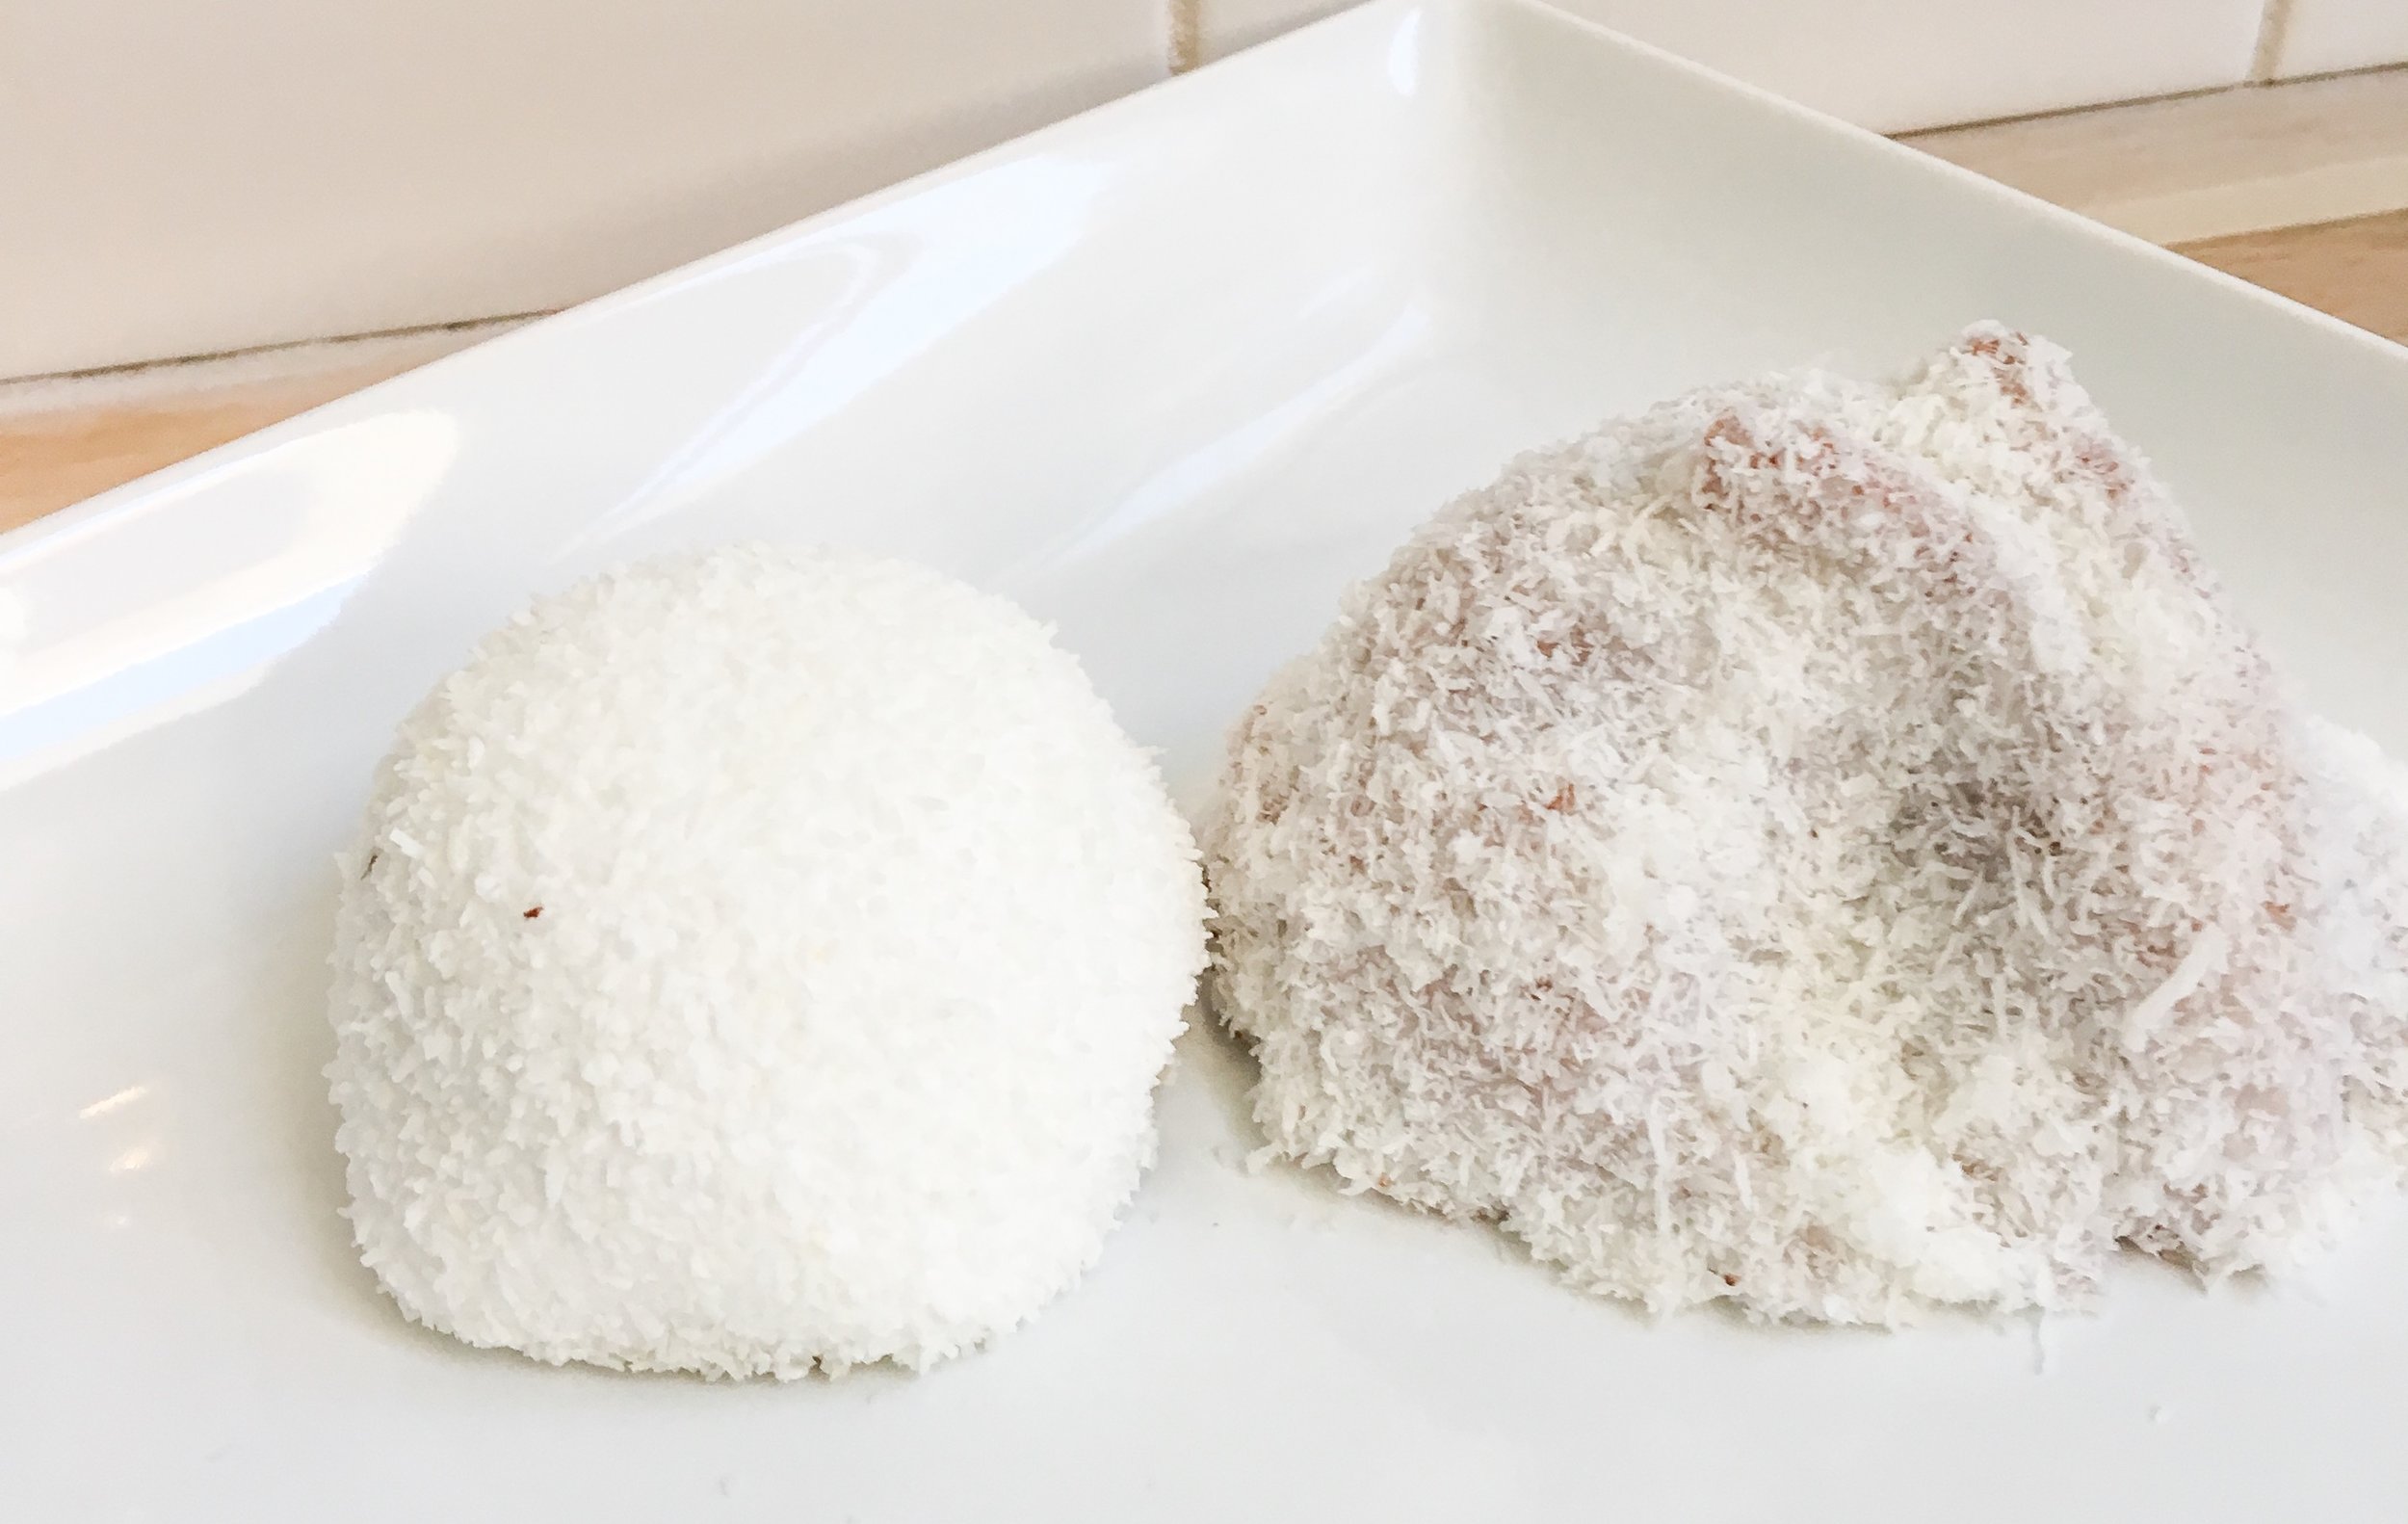
Another idea was to drizzle on some thin icing, and sprinkle shredded coconut onto the bunnies. I thought this idea was sheer genius, but it did not work either. Are you familiar with the Hostess treat called a Sno-Ball? My coconut-coated bunnies reminded me of this old-time childhood favorite:
The coconut dusting make the bunny look like a sno-ball!
At this point, I felt myself on the verge of a major Pinterest Fail. I could always make a bunny-less cake, but as I have mentioned before on my daughter’s blog, I do not like to back down from a challenge. Stephanie and I put our heads together and decided that a more dense, and darker colored type of cake might work better.
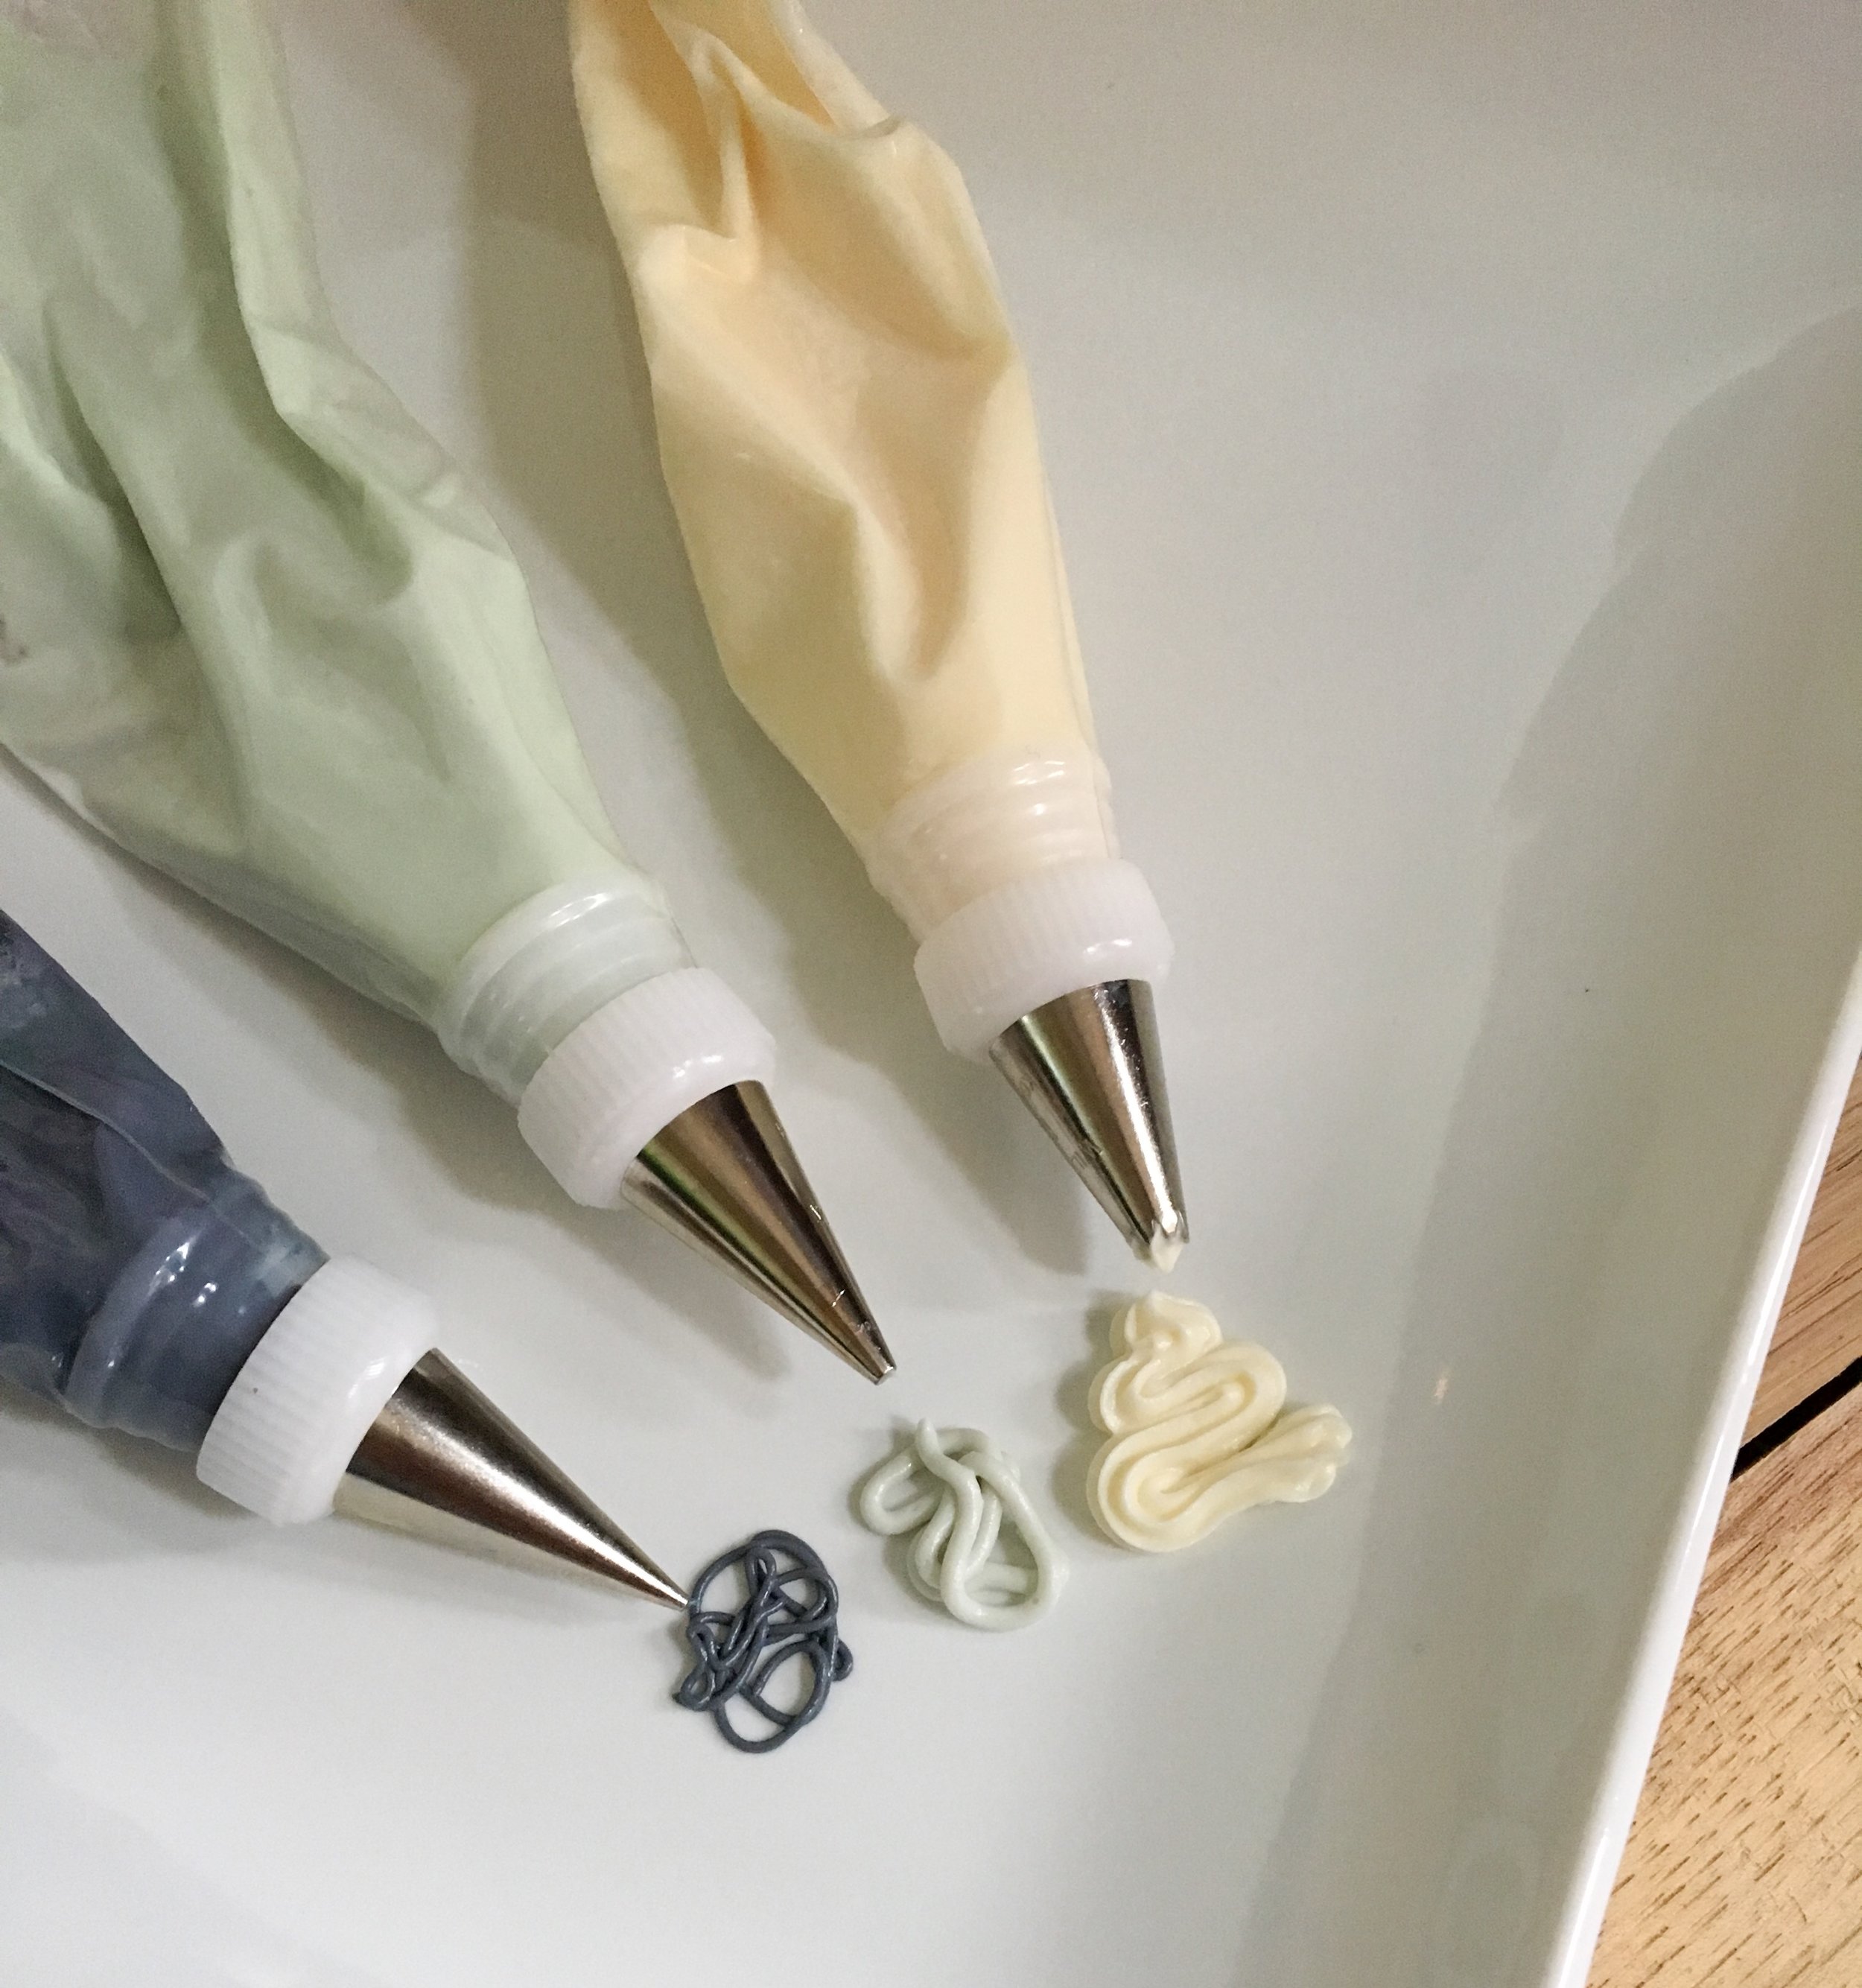
The carrot cake turned out to be a huge improvement. The bunny carrot cakes baked up just great! The surface was smoother and it was easier to see the bunny shape. Using just a store-bought cream cheese frosting, I piped on some ears, eyes, and a big tail, and with that my bunnies were complete.
Carrot cake bunnies with cream cheese frosting accents

In case you were wondering if the test bunnies went to waste, I’m happy to report that the two men living in the house gobbled up the test bunnies with all the enthusiasm they had for the regular cake!
Now that the bunny situation was under control, it was time to move on to the rest of the project. For the base cake, I used my various Wilton pans and accessories to make a two-layer 9x12 cake. The sides of the cake were decorated with the basket-weave technique (yes, it is icing!) and for the top, I arranged the bunnies on a “lawn” of green icing. These are done with decorating tips #47 (basketweave) and #233 (grass) if you want to try this yourself.
The end result was a big hit:
The finished Bunny Cake
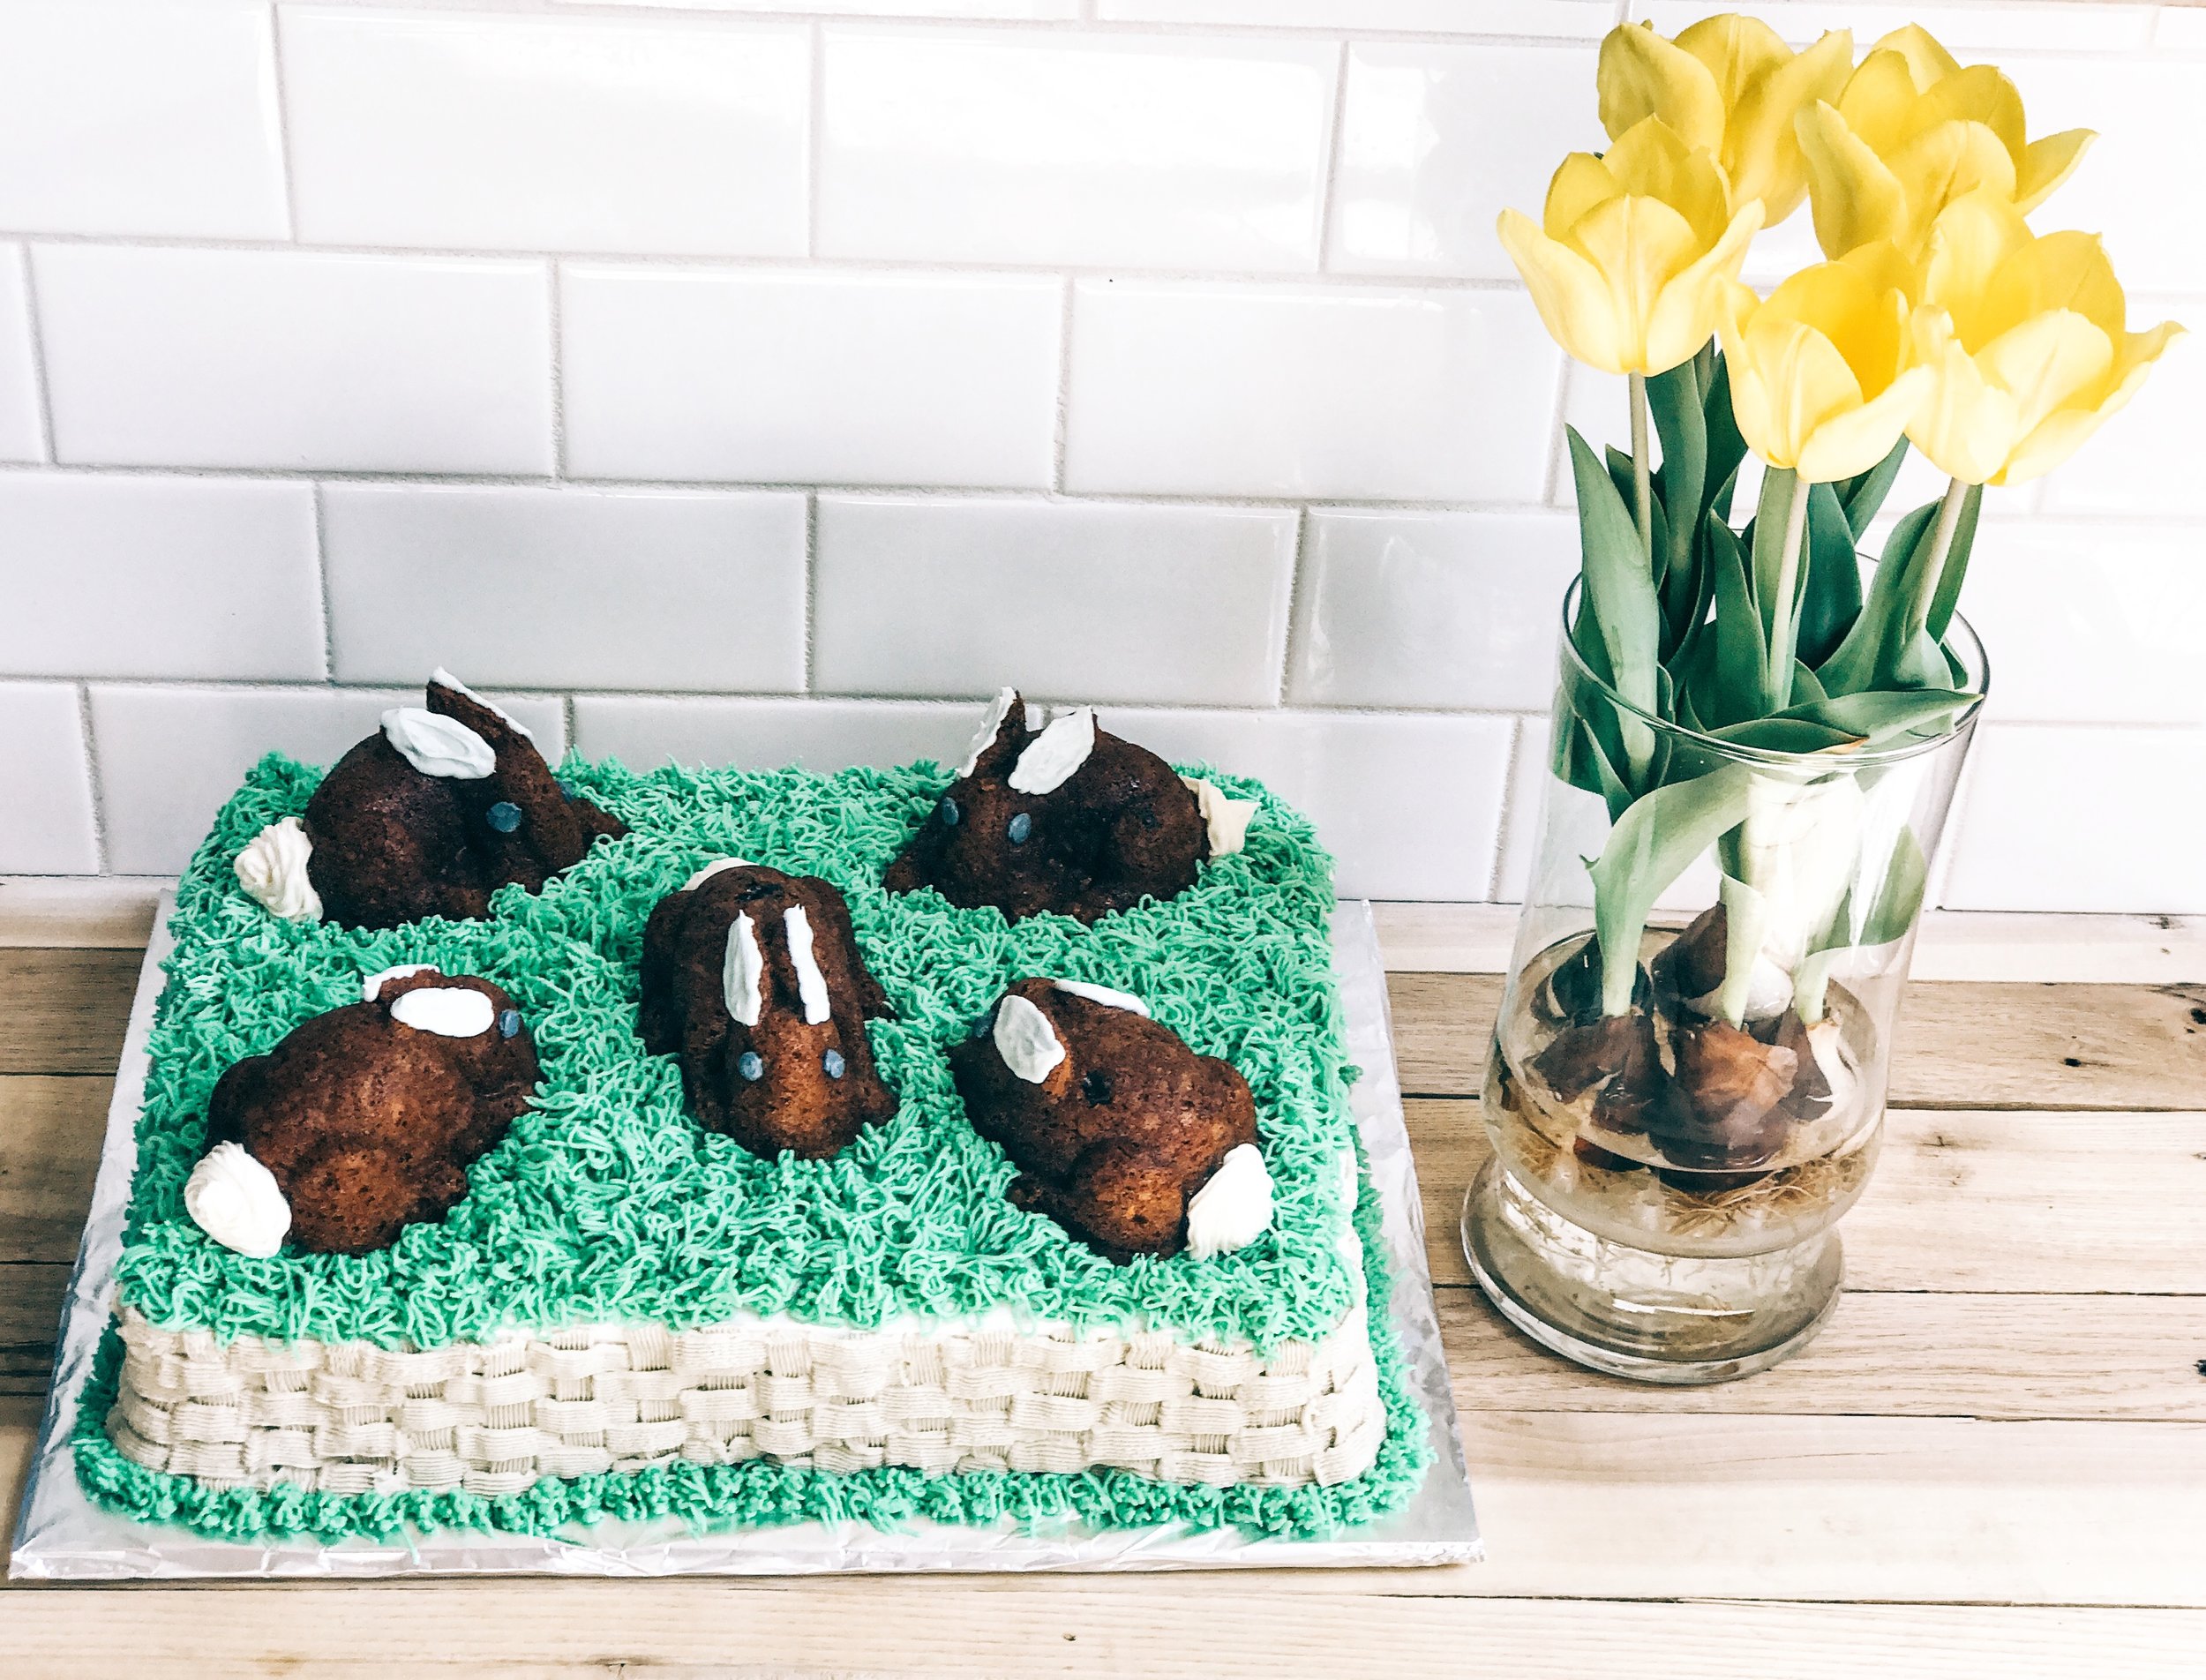
This Easter cake dessert was a lot of fun to make, and it was a huge success at my sister’s gathering. Decorating a cake like this is really not hard at all! Anyone can do it with just a little practice, and I truly mean that. Like anything done well, you need the right tools for the job. I’ll definitely be making this again. A new tradition is born!
The bunnies were a hit at the party!

